Sculpting the Face For a Cloth Doll
2015::365::2-5
I’ve been meaning to post this for a while but have been feeling kind of apprehensive about it and writing all kinds of disclaimers in my head. I’ll just go with this: This is the gist of how I do the soft sculpture for the face of most of my dolls. Not all doll makers do it this way and some don’t add any felting at all. I see a lot of questions about this process in the doll making community. So, I thought I’d share what is working for me right now.
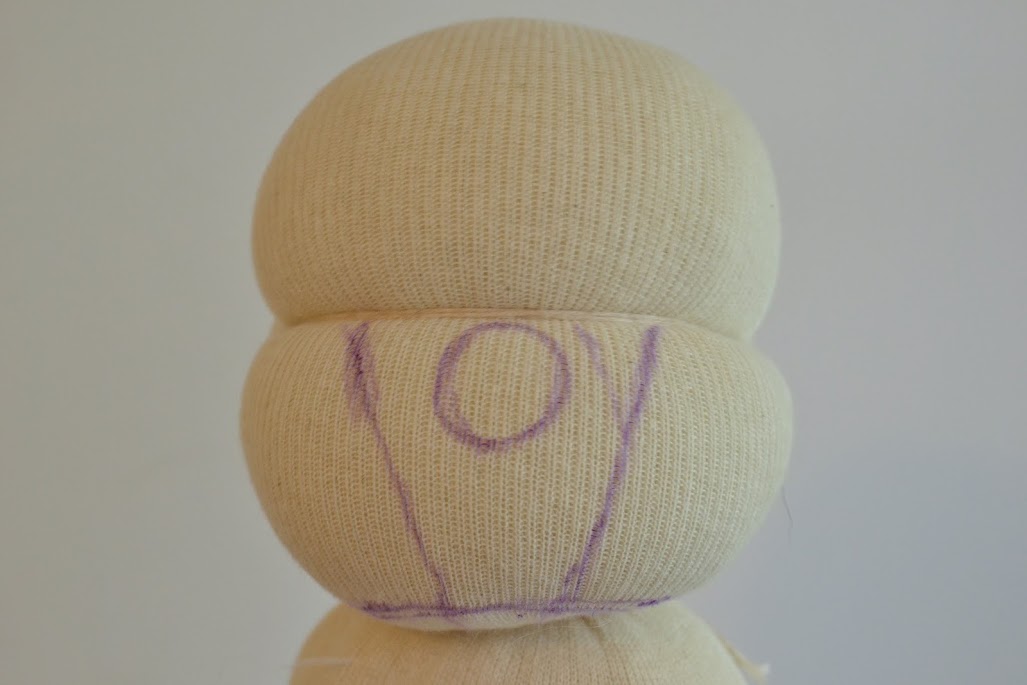
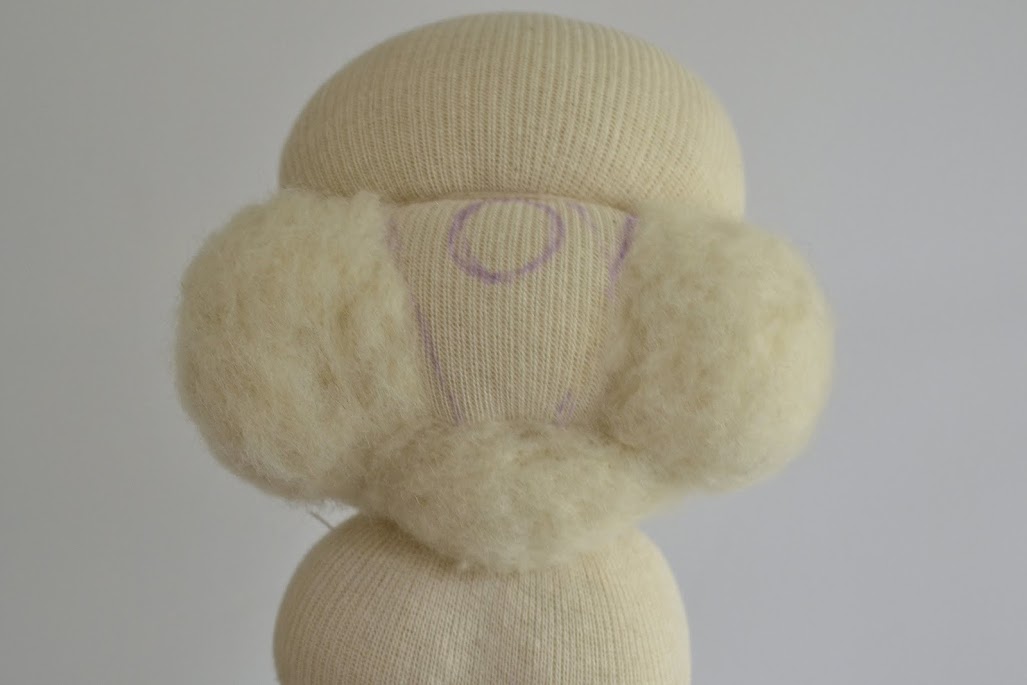
I begin by rolling and tying the head in the traditional Waldorf manner. Using a sewing marker, I roughly sketch where I want the features (cheeks, nose, chin) to be. After that, I needle-felt the cheeks and chin until they look about how I want them. I try to felt quite firmly so the features are not compressed and lost once the skin goes on. I also portion the wool for the cheeks before I begin to help assure they will be about the same size.
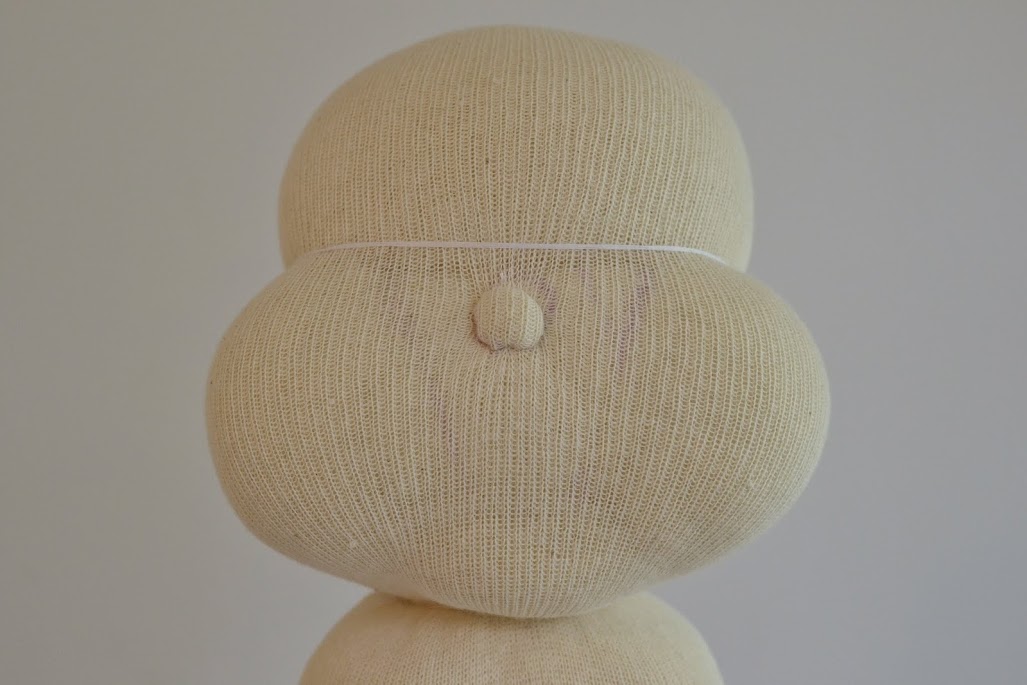
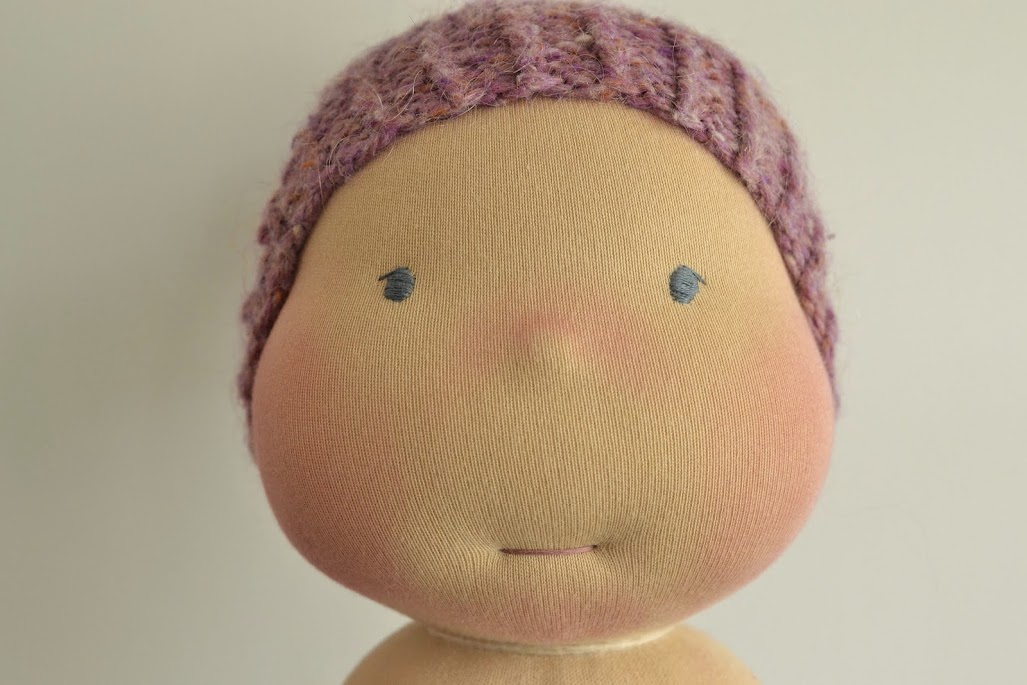
Once the cheeks and chin are in place, I add a second layer of stockinette to smooth things out and tie under the chin as usual. I then re-tie the eye line and make a nose. Now just add some jersey and embroidery and a sweet face will soon emerge.
Again, I don’t mean this as a tutorial so much as a show and tell sort of post… I feel very apprehensive to give direct advice as it is important to find one’s own way of doing things. On the other hand, it is often very helpful to see how others do things. I hope this helps.
~Carrie
PS In case you’re wondering, the model for this post is lovely Harper (a favorite of mine).


Carrie, this is totally cool! Thanks for sharing. I have no idea how a cloth doll is made and would not ever have guessed that all of these little steps are involved. With those purple lines on the face, she looks like a plastic surgery patient before a cheek implant! :)
Yes, but these cheek implants are all natural! ;)
I absolutely love the face, he looks so hugable already. I made 2 (a long time ago) and had such trouble with the chin/neck situation. Yours looks amazing. Love the stuffed cheeks.
It’s a relief to find soemnoe who can explain things so well
How very kind of you to share your talents with all of us….. thank you.
Thanks!!!!!!
This will help me a lot, because I always loved those thick, round cheeks and never knew how to create that affect, but with your help I can get along!! Thank you again!!
Marijke from Holland
Thank you so much! I am starting my second doll, and have been going crazy trying to figure out how to get the plump cheeks and cute features of so many wonderful doll faces. This is perfect!
I’d love to see a side-view picture so that I could better gauge where the cheeks end, on the side.
Thank you so much for sharing! I had also wanted those juicy, chubby cheeks and, importantly, for the top of the head to not look so bulbous (which I think that they do when the cheeks aren’t chubby enough)! I can’t wait to do this! Just waiting on some wool and stockinette! :-D
I searched two days at my Laptop. Thank you very much! I’m hopeful for my first doll. Now I try it. Your doll skin looks so lovely,
Ich bin völlig hin und weg und restlos begeistert. Vielen Dank
Bettina